A Word or Two About Making Needlepoint Embroideries
Running a needlepoint kit business, a large part of my job is to ensure that the designs we Commission will be successful in kit form. I find myself having to stitch and experiment to achieve what the designer intends, for a design that is on paper will not always work on canvas. It was only a short step to design for myself; tracing shapes and images onto the canvas was a good way to begin, and is how I still set out most of my patterns.
Color is a whole new subject. Discovering how to put wool colors together is perhaps the most exciting and challenging part, for what looks pretty in the hand is not automatically successful when stitched. I learned not always to choose colors that I liked as individuals, for odd colors often point up other shades to their best advantage.
Color is a whole new subject. Discovering how to put wool colors together is perhaps the most exciting and challenging part, for what looks pretty in the hand is not automatically successful when stitched. I learned not always to choose colors that I liked as individuals, for odd colors often point up other shades to their best advantage.
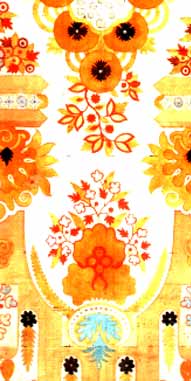 Silk design by James Leman, dated 1710 – the simple shapes and uncomplicated coloring are straightforward to translate into needlepoint.
Seemingly innocuous shades, especially when used for backgrounds, can kill other colors off if they are all of the same tone, reducing everything to muddiness. Most of what I have learned has come through, trial and error, but it helps to look closely at fabrics and paintings to see how the artist has manipulated the shades.
The basis of freestyle (as opposed to geometric) needlepoint patterns is the art of making curves from straight lines. When I demonstrate, many people tell me that they find it difficult to decide at the edge of a petal, leaf or other curve, where to finish one color and start the next. My response is to tell them not to worry about it and just keep stitching down the curve.
You can always go back and add a stitch afterwards or stitch over one that still really bothers you when all is finished. But it is amazing how the eye adjusts, for how many pieces" of work have you seen that really look stilted when finished?
Filling in the background also pushes the stitches around a bit and softens the outlines. Many people return their completed needlepoint embroideries to me to have them made into cushions or stools; each is different, but I have never had one where the pattern has been spoiled.
Also, I am pleased when people make changes to suit their own color scheme or incorporate stitch techniques that are appropriate. Fear is the biggest hurdle for many, but this can be overcome with a little freedom of the mind and fingers.
Each design is introduced by showing the source material that inspired' it, together with details about my approach when adapting the original for use on canvas and the way in which the colors were chosen. A flat image of each embroidered canvas is included so that you can see how effects have been achieved and how colors can work together in different contexts.
You may observe that riot all colors are pretty on their own but combine for an effect. These photographs also show how surface stitching can be used to add detail and interest to a flat finish. Charts do not show you this, and the idea of the guides available on this site is to share my exploration of the V&A and the experience of working the pieces with the reader to give help, guidance and encouragement.
You can use the shade palettes for your own work if the particular color scheme suits your needs, as they are tried and tested, but do not be afraid to experiment with combinations of your own choosing. Some people will find the photographs a good enough guide to work from, but charts can be purchased via the internet you prefer.
Although there are detailed descriptions of a variety of stitch techniques as they arise in the text, the basic skills are covered in this extremely helpful post. Anyone who is new, or relatively new, to needlepoint should start by reading this post before embarking on any of the designs.
There are many uses for needlepoint, but purchased kits tend to be for cushions. Other items of furniture vary in size so much that it is difficult for manufacturers to produce kits that are sure to fit. The instructions throughout this website provides an opportunity to show many different ways of using needlepoint — on chair seats and stools of all sizes, as bolsters and firescreens, and for simple upholstery.
Most of the designs can be used in several ways and can easily be made to fit pieces of furniture of different sizes. It is not a difficult task to adapt designs to suit your needs, and suggestions for doing this are included throughout the text. It is assumed that readers will include both beginners and experienced stitchers.
I trust that the instructions will give you helpful guidance. However, the directions for making the stitched pieces into home furnishings assume a basic knowledge of sewing. Detailed instructions on joining piping cords, putting in zips and handling a sewing machine could fill an entire website or a book on their own.
Most people who sew enjoy sharing and showing off their skills to others; an hour of basic instruction from a friend should give you enough knowledge to tackle most of these projects, but perfect finishes are achieved through practice.
Experiment first with spare scraps of fabric if you are unsure. I have not attempted to do any in-depth research on the pieces chosen as the basis for these designs, but urge you if possible to visit the V&A to see and learn more. If the V&A is not accessible to you, your local museum or art gallery will undoubtedly house treasures that can be used as personal sources of inspiration.
I have not set out to produce an historical tome, but rather to encourage needlepointers to have a go at creating their own patterns and to use the past as an inspiration for today. One can learn a great deal from copying something before taking the big step, and there is plenty of material here to work from.
Prince Albert wanted us to use the Victoria and Albert Museum as a resource to help us to produce good designs. I hope the instructions shared on this site will help you to do that.
