Assorted Stitching Tips and Instructions for Beginners
HOW TO MAKE A PLASTIC CANVAS GARLAND
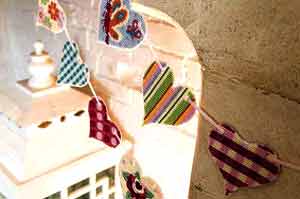
1) Stitch each design in the center of a plastic canvas piece. Plan first to use the sheet economically for your design placement—either cut out pieces for each design, leaving 5cm (2in) all the way around to give you something to hold on to. Or don’t cut it to size first, and stitch the hearts close together with just enough room to cut them out. For two strands of cotton as here for 14-count canvas, use a loop start and work over one bar of the canvas, and remember you can’t use it in a hoop or frame.
2) When finished, cut out each heart following the shape of the design. Always leave one full square of canvas at the edges, so the stitches are secure.
3) Carefully cut slits at the unstitched lines at the top of the hearts. Thread ribbon through making sure it’s not twisted.
2) When finished, cut out each heart following the shape of the design. Always leave one full square of canvas at the edges, so the stitches are secure.
3) Carefully cut slits at the unstitched lines at the top of the hearts. Thread ribbon through making sure it’s not twisted.
Sewing Junkie’s Special Tips:
Minimize wear and tear on metallic thread by making sure you use a shorter length in the needle than you would for stranded cotton.
HOW TO ADD SEQUINS TO ANY STITCHING DESIGN
Using one strand of thread to match your sequins, bring your needle up as indicated. Thread the sequin on (try a fine beading needle if the hole is too small). Stitch down over the sequin edge, not tilting it and pull the thread taut. If you prefer, use a central French knot or a seed bead to fix each sequin.
Sewing Junkie’s Special Tips:
When stitching on plastic canvas, pick a design that is densely stitch as you’ll get best results when there is little or none of the canvas showing. Like any other embellishment, make sure to finish all other stitches before adding the sequins at the end.
HOW TO ADD BACKSTITCH TO ANY STITCHING DESIGN
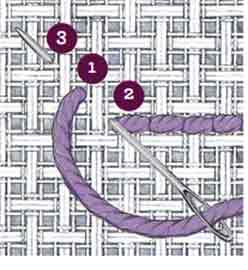
When you’ve finished all the cross stitches, load your needle with one strand of thread as indicated in the key above. Following the backstitch line on the chart, make your stitches as in this diagram. Bring your needle up at 1, down at 2 then back up at 3, stitching in a two steps forward, one step back motion. To prevent the thread fuzzing from wear, use short lengths.
Sewing Junkie’s Special Tips:
Sort your threads before you start stitching. Use a shop-bought thread sorter, or make your own by punching holes in a piece of cardboard.
HOW TO KEEP YOUR STITCHING NEEDLES IN ONE CONVENIENT PLACE
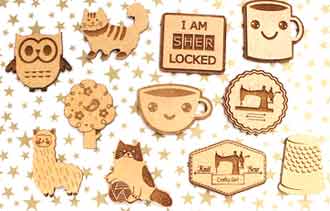
Keep your needles handy while stitching and safe when finished with these cute wooden magnetic needle minders. Select the design you like from three different varieties. For your info, every single minder is composed of wood and has been finished for the sole purpose of providing protection to your precious embroidery fabric. Get one or all three if you can’t choose a favorite—like me!
RECOMMENDED STITCHING PRODUCTS
Stitched Slogan
The latest designs from Frances Collett are these slogan cross stitch kits to adorn your walls! The kits contain everything you need, including Frances’ own-design fabrics for a unique look, and her designs include the printed lettering for you to stitch as they don’t include charts. They have the fabric, a wooden hoop, needle, threads and instructions. I love ‘Sweet Dreams slogan (415097), measuring 15cm (6in) across and the ’Home Sweet Home’ slogan (409496), which is 20cm (8in) across.
Stitching Pattern Cards
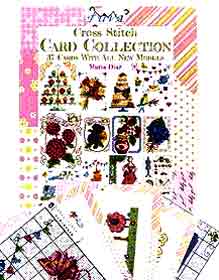
This compilation of 37 individual designs all with their own pattern card, by Maria Diaz Designs and published by Tuva, is perfect for projects on the go. With greeting cards and other small projects in mind, the designs have been grouped so each can be worked individually or as part of a set.
I like that the patterns are easy to follow, using a limited color palette and very little backstitch. Also, the handy-sized cards are practical to use. The vintage feel to this collection includes silhouettes and old-fashioned sewing patterns to create the figurative charts. It’s a great new collection of charts to stitch for all occasions.
I like that the patterns are easy to follow, using a limited color palette and very little backstitch. Also, the handy-sized cards are practical to use. The vintage feel to this collection includes silhouettes and old-fashioned sewing patterns to create the figurative charts. It’s a great new collection of charts to stitch for all occasions.
