How to Make a Basic Cushion Needlepoint Cushion

You will need a piece of furnishing fabric a bit larger than your stitched work and a zip about 3-inch (7.5cm) smaller than the width of the stitched canvas. Trim your canvas, leaving a margin of about four holes of canvas all the way around.
Cut your backing fabric 3-inch (7.5cm) wider than this and 5-inch (13cm) longer. Cut the fabric in two across the width, about 6-inch (15cm) from the top. Put the two pieces of fabric right sides together, and lay the zip along the cut line in a central position.
With taylors' chalk or pins, mark where the zip starts and finishes. Machine up to this mark at each end (approximately 1 1/2-inch /4cm in from each edge). Lay the fabric flat on the ironing board and press the fold where the zip is to be inserted.
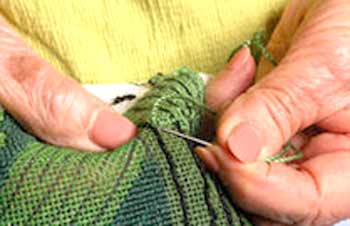
Baste and then machine the zip in place. Leaving the zip partly open, put backing fabric and canvas with right sides together. Baste and stitch the two pieces together, running them through the machine with the canvas uppermost.
The machine stitches should run in the middle of the holes of the last line of stitching—if you go slowly this should not be difficult. If you stitch further in you will not get a clean fold, and if you machine further out the raw canvas will show. Take care over this; it is worth the effort. Snip across the corners and turn the work right side out. Ease the comers out, using your tapestry needle—you can get them quite crisp if you work at it gently.
If you are piping your cushion, you should machine the piping to the canvas then sew the back on by hand. It is impossible to get a neat finish using a machine without losing a lot of your stitching, which would be a pity.
Piping helps to correct distorted canvases, especially if you sew the back on straight (it seems awkward when you are doing it) rather than following the shape of your canvas. When you put the pad in it helps pull the work in the right direction.
Cut your backing fabric 3-inch (7.5cm) wider than this and 5-inch (13cm) longer. Cut the fabric in two across the width, about 6-inch (15cm) from the top. Put the two pieces of fabric right sides together, and lay the zip along the cut line in a central position.
With taylors' chalk or pins, mark where the zip starts and finishes. Machine up to this mark at each end (approximately 1 1/2-inch /4cm in from each edge). Lay the fabric flat on the ironing board and press the fold where the zip is to be inserted.
Baste and then machine the zip in place. Leaving the zip partly open, put backing fabric and canvas with right sides together. Baste and stitch the two pieces together, running them through the machine with the canvas uppermost.
The machine stitches should run in the middle of the holes of the last line of stitching—if you go slowly this should not be difficult. If you stitch further in you will not get a clean fold, and if you machine further out the raw canvas will show. Take care over this; it is worth the effort. Snip across the corners and turn the work right side out. Ease the comers out, using your tapestry needle—you can get them quite crisp if you work at it gently.
If you are piping your cushion, you should machine the piping to the canvas then sew the back on by hand. It is impossible to get a neat finish using a machine without losing a lot of your stitching, which would be a pity.
Piping helps to correct distorted canvases, especially if you sew the back on straight (it seems awkward when you are doing it) rather than following the shape of your canvas. When you put the pad in it helps pull the work in the right direction.
Using Needlepoint in Your Home
It is not practical for manufacturers to make kits for mounting onto furniture (except perhaps chair seats) as the sizes vary so much. Most of the items of furniture in my apartment come from junk shops: the three chairs, the Nut Tree child's chair, the Fantasia fireside chair and the fire screen mount (formerly a mirror frame) were all bought with needlepoint in mind.
Having them upholstered was surprisingly inexpensive compared with buying new furniture. The valuable part is the needlepoint, and the challenge is designing something to fit.
Having them upholstered was surprisingly inexpensive compared with buying new furniture. The valuable part is the needlepoint, and the challenge is designing something to fit.
Covering Chair Seats
It is necessary to make a template so that you are stitching the correct size of canvas. A piece of paper or old cotton sheeting can be draped over the chair, pinned in place and then cut to fit. Cut out the corners and along the edges where the fabric meets the wood. The result should look roughly the shape of the diagram shown.
Be generous—the upholsterer will cut the edges, believe it or not, and needs a good margin with which to work. Pulled too tight, the canvas will be under great strain when sat on and may split. Using your template, trace the shape on the canvas. Make some marks where the canvas folds down the chair, so that your design is sympathetic to the shape of the seat.
Tent or cross stitch are recommended for upholstery, as they are hardwearing. Half cross stitch is too thin to wear well. De luxe mono canvas has the highest tension resistance, and is the best for chair seats.
Cleaning Your Needlepoint Creations
Needlepoint wool is surprisingly resistant to dirt, but once washed will be less so, which is another reason why you should not over wet your canvas when stretching. Washing will also take out of the canvas the dressing which is needed to help keep it straight, and there is a danger that the canvas will shrink and cause the work to pucker.
A good spray with a proprietary dirt repellent will give added protection, and will save the day if anything is spilt on it. If a piece is really dirty, dry cleaning is the best solution, but use a quality service, not a slot machine. Dry cleaning spray can be used to remove dirty spots. Vacuum the powder out when it is dry, rather than brushing it, which will damage the wool.
Your needlepoint should last for your grandchildren to enjoy, and the many hours of pleasure that you have had in stitching it make it into something special and valuable to you. It is worth taking good care of it. Happy stitching!
