The Simplest Approach to Gathering and Ruffling Fabric
The usual sewing technique that you most often see for gathering fabric or making ruffles is to use 2 rows of basting stitches (one is made at 1/2 inch from the edge and the other is stitched 1/4 inch from the cut edge of the fabric). Then, you pull the two threads and what happens?
The thread often breaks before you can finish your gathering project. Your gathers are not nice and even. And, you are upset.
Save yourself from all this frustration. Try these sewing techniques for sewing success. Get really pretty gathers and ruffles. Get rid of the homemade look!
The thread often breaks before you can finish your gathering project. Your gathers are not nice and even. And, you are upset.
Save yourself from all this frustration. Try these sewing techniques for sewing success. Get really pretty gathers and ruffles. Get rid of the homemade look!
Gathering Method #1
Wind your bobbin with heavy duty thread.
Use regular sewing thread on the top of the sewing machine.
Loosen your upper tension slightly. This makes a looser stitch on the bottom (which, in this case, will be the right side) of the fabric.
Set your machine stitch length slightly larger than your regular stitch length. (No. 3 on many sewing machines will work fine.) You will get prettier stand-up gathers if your stitch length is smaller than the large basting stitch that creates flatter gathers.
Place the fabric wrong side up at the sewing machine.
Backstitch to secure the threads as you begin so they will not pull out when you start gathering.
As you start to sew the gathering stitches, make sure your needle is in the down position. If you place your needle in the same position to start each row, then your gathers should line up between the rows and not be at an angle.
It is a little thing, but it makes a difference in how it looks when finished.
You will sew two rows of stitching:
Sew the first row 3/4 inch from the cut edge.
Sew the second row 3/8 inch from the cut edge.
Notice that your first row of gathering stitches is below the 5/8 inch seam line of the garment. This will control your gathers much better.
Pull both bobbin threads (both at once) to gather up your fabric to meet whatever you are stitching this ruffle or gathered fabric to.
Wrap the long loose ends around a vertical pin to hold in place.
Using another pin, adjust the gathers evenly along the straight piece or band where you are attaching the ruffle or gathers.
Once you are pleased with how the gathers look, use regulation stitch to sew the gathered fabric to the straight piece on the 5/8 inch seam line.
When finished, clip the bobbin thread that shows on the outside of the garment, and remove it. It should pull out easily.
Gathering Method #2
Set up your sewing machine for a normal zigzag stitch. Use regular sewing thread on the top and the bobbin.
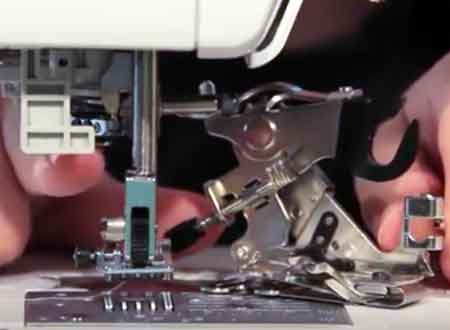
If you have a sewing foot with a hole in the center of it, put it on your sewing machine.
Place the fabric that you want to gather, wrong side up at the sewing machine.
Place a spool of heavy carpet thread in your lap. I have a spool of gray carpet thread that I use for all my gathering. You can also use string or a lightweight cord. Remember this thread or cord is NOT in the machine.
If you have the sewing foot with a hole in it, pass one end of the carpet thread through the hole and pull out a few inches of the carpet thread to the back of the sewing machine.
If you don’t have such a foot, that’s OK, but if you have a satin stitch foot or any foot with a tunnel or slight groove on the bottom, that will work, too.
You are going to lay the cord down on the fabric and zigzag over top of it creating a tunnel for the cord.
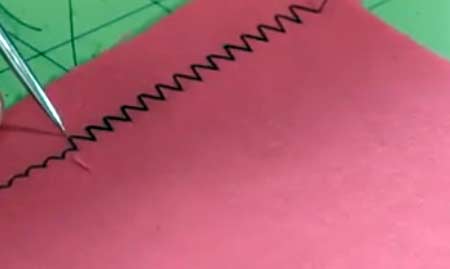
The zigzag stitch should only be large enough to go over the carpet thread and NOT catch it in the stitching. Don’t use the largest stitch you can make.
When you begin stitching, make sure that you first secure the carpet thread to the fabric at the end by actually stitching through the cord a few times. You don’t want it to accidentally pull out while you are working.
Lay your carpet thread about 1/2 inch from the cut edge just above the seam line.
While guiding and holding it in place, slowly zigzag over the carpet thread to the opposite end.
Cut the carpet thread leaving a long tail.
When you pull this strong carpet thread, it will gather the fabric.
Use a straight pin to adjust the gathers to where you want them.
You can do this method with one row of stitching. However, for the prettiest gathers, use 2 rows, one at 3/4 inch and the other at 3/8 inch from the edge.
I use the carpet thread zigzag method when I have really long rows of ruffles to make such as ruffles on curtains, pillows or broomstick skirts.
We will finish this post tomorrow. Be sure to check in to find out how to avoid tucks when easing in your sleeves.
Why Not Use The Ruffler Attachment?
I rarely use the ruffler attachment to my sewing machine. It seems that the gathers are either too much or too little and the stitches often break.
With the methods above, you have more control over how much gathering you want and where you want it. And, you don’t have to worry about broken threads.
Try these easy sewing techniques to sew pretty gathers and ruffles the easy way. Avoid sewing frustration.
With the methods above, you have more control over how much gathering you want and where you want it. And, you don’t have to worry about broken threads.
Try these easy sewing techniques to sew pretty gathers and ruffles the easy way. Avoid sewing frustration.
