How to Edge Stitch on Your Sewing Machine
Hello Everyone!!
When you learn how to sew, learning basic stitches, such as those I am teaching on this site, is critical to the success of your projects. Many of these stitches will be listed in your pattern instructions, so learning and practicing them before you need to use them in a project will help you immensely – you’ll already know what the pattern instructions are referring to!
In today’s basic sewing tutorial we are going to discuss edgestitching. Edgestitching is just what it sounds like – stitching near the edge of something – usually a seam. You will see edgestitching in many places such as around the top of waistbands, cuffs, collars, and shirt plackets (where the shirt’s buttons and buttonholes are). Sometimes edgestitching is used as a way to tame seams with many layers, such as in a waistband. Sometimes it is used simply as a decorative element.
This stitch can take practice to become really good at. If you are using a regular presser foot, you will have to be really steady to get an even line. Here are 2 presser feet that can help make the job a little easier. They are clear, so you can see your fabric edge really well, and they both have a small line on them that you can use to line up your fabric edge.
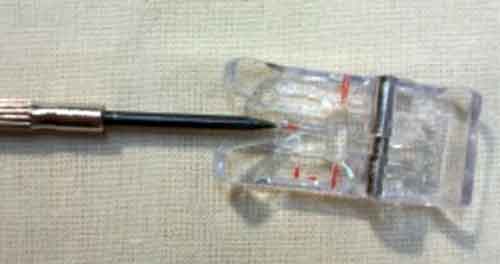
Clear plastic presser foot with red markings for stitch placement
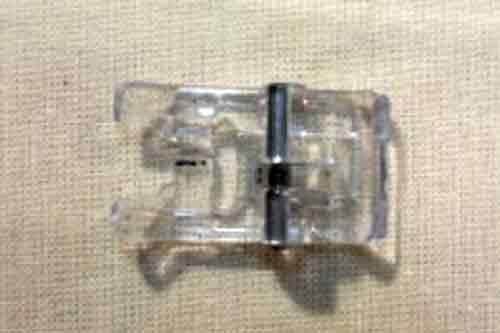
Clear presser foot with black edgestitch guide
Now, depending on your sewing machine, and attachments, you may have one of these presser feet, which are called blindstitch or edgestitch feet. These specialty presser feet have guides for the fabric, and screws for adjusting how far the fabric is from the needle position (which determines how far from the edge of the fabric the stitch will be). This type of foot is the easiest to use to get a straight, even line of stitches.
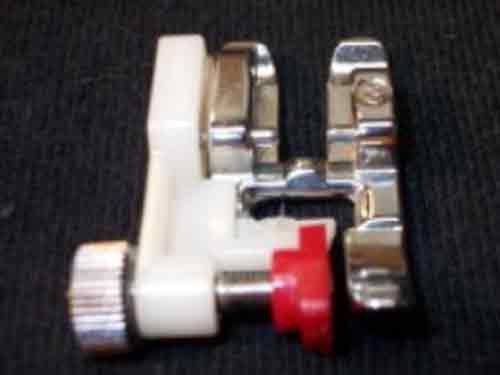
Blindstitch or edgestitch foot #2
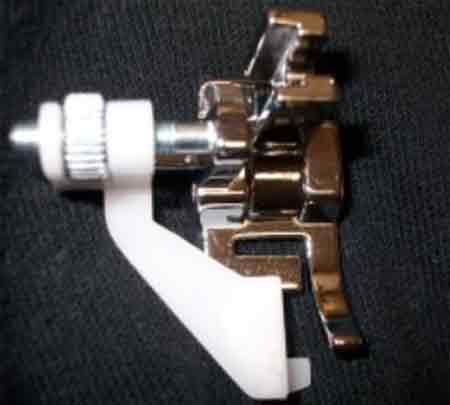
Blindstitch or edgestitch foot
I am going to demonstrate this stitch using the last foot pictured above. First, I have a sample of a fabric that has a facing sewn to it (interfacing, too). After the seam is stitched, press flat and then press the facing under.
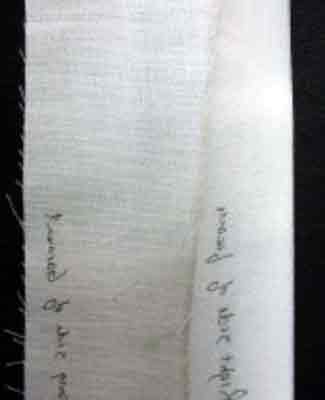
Faced seam needing pressing
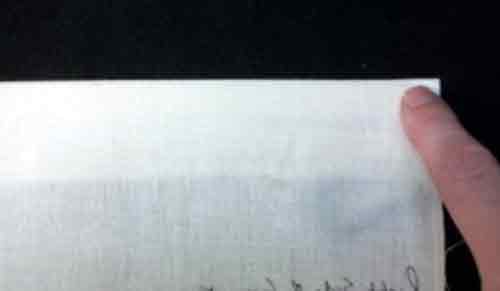
Faced seam pressed and ready for edgestitching
To edgestitch, place the folded edge of fabric into the slot of the presser foot like this:
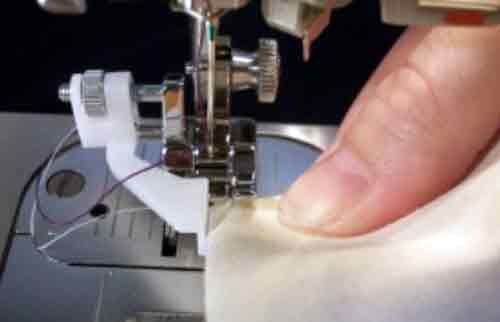
Placement of fabric edge in edgestitch foot
Check where the needle will fall near the edge and use the screw to adjust where you want the line of stitching:
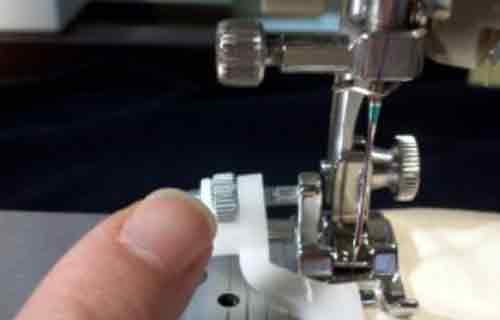
Adjustment screw for depth of stitch
Now, keep your fabric edge just touching the side of your guide on the foot, and stitch. Practice until you get a neat and even line of stitches. See, not so bad at all!
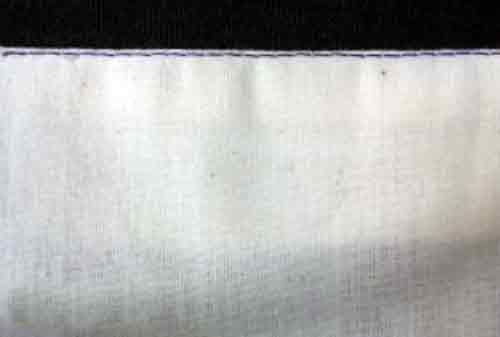
Finished Edgestitch
Now, one word of advice, and believe it or not, I only learned this recently (and I’ve been sewing 25 years!), keep your eye on your guide, and DON’T look at the needle. Whether you are using one of these “fancy” feet, or a regular foot, and you are using some other mark as your guide, make sure to look keep your eye on the guide – you’ll be amazed at the difference it makes in achieving a straight line!
That’s it for the “learn how to sew” basic sewing tutorial today. I encourage you to practice this stitch until you can sew a nice straight line. And practice all the others, too! Please send me any questions or concerns you may have about this or any other sewing technique – I’ll be delighted to answer as soon as possible!
Thank you SO much for visiting today. Please return soon!!
