How to Sew Sash Belts
Hello Sewing Fans,
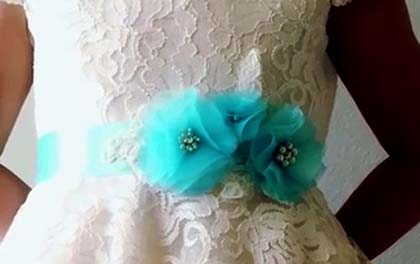
Sash belts are very popular right now. They make great gifts and are a fun sewing project. Kids and adults wear them around their waist, as a headband, tie them on their purses, around their legs, anywhere they want to tie a sash.
I absolutely love to demonstrate how to sew this sash. It is a WOW every time!
I call this particular sash, The Magic Sash. The sash is made of straight of grain fabric, but because of a tricky sewing technique, it comes out bias.
Mrs. Edna Bryte Bishop made this sash belt famous many years ago. I’ve been teaching it since the early 60s and it is always a hit.
The sash can be made any width or length. The thing to remember is that when it is finished, it will be about two-thirds of the original width and length.
For example, if you want a finished sash 60 inches long and 6 inches wide, you must start out with fabric 90 inches long and 9 inches wide.
You can use one fabric or multiple fabrics stitched together. I used two fabrics for demonstration purposes.
How to Cut the Magic Sash
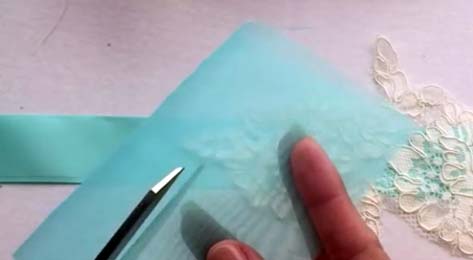
Cut straight of grain strips of fabric crosswise or lengthwise as long and as wide as you want them to be keeping in mind that they will finish two-thirds this size in length and width.
Note: Since you are cutting straight of grain fabric, it doesn’t take nearly as much as if you were cutting a bias sash. This sash is a big money saver, too.
Note: Since you are cutting straight of grain fabric, it doesn’t take nearly as much as if you were cutting a bias sash. This sash is a big money saver, too.
How to Sew the Magic Sash
If you are using more than one fabric, stitch them together with 1/4 inch seams to create one long strip of fabric.
Press the seams open or to one side if you used a serger.
Lay the strip right side up.
Bring the upper left corner down to the right side to form a triangle.
Press the seams open or to one side if you used a serger.
Lay the strip right side up.
Bring the upper left corner down to the right side to form a triangle.
Magic Sash 1
Starting at the top point of the triangle, stitch a 1/4 inch seam on the right hand side of the triangle stopping 1/4 inch before you get to the base of the triangle.
With the needle of the sewing machine down, lift the presser foot and pivot the base of the triangle over to the right to meet the cut edge of the fabric. That is, the red fabric edge at the base of the triangle will come over to meet the right side edge of the white fabric.
With the needle of the sewing machine down, lift the presser foot and pivot the base of the triangle over to the right to meet the cut edge of the fabric. That is, the red fabric edge at the base of the triangle will come over to meet the right side edge of the white fabric.
Magic Sash 2
Lower the presser foot and continue stitching the 1/4 inch seam all the way to the end of the sash. This will look very twisted and messy, and you will think that it is wrong, but trust me, it is right!
When you are finished, press the seam open. You will notice that the fabrics are now spiraling around the sash. Voila! The Magic Sash! What was once straight of grain is now bias!
Turn the sash right side out. Finish the end of the sash - stitch it by machine, by hand or fuse it.
Note: You may have to trim the ends to make them even in some cases.
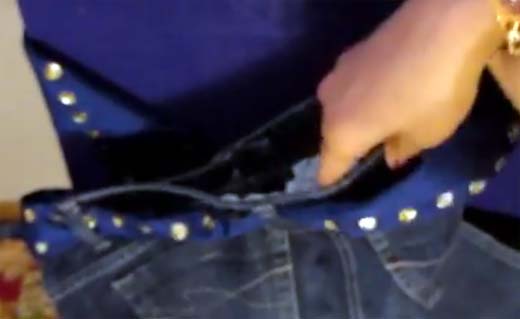
Don’t you just love it? Now, is that a WOW! or what?! See how cute the Magic Sash looks with the recycled jeans skirt!
Jeans Skirt with Magic Sash
Try some pretty striped fabric for a very nice effect. This sash can turn a very plain garment into a glamorous outfit.
Think about some wide sashes out of some gorgeous fabric to wear with your party palazzo pants or long holiday skirt. Tie two or three sashes together for different looks. Intertwine some beads or add some tassels at the ends.
And, don’t forget to sew some sashes for your home decoration projects. They are great tie-backs for curtains and drapes. Tie one around a pillow, too.
And, don’t forget to sew some sashes for your home decoration projects. They are great tie-backs for curtains and drapes. Tie one around a pillow, too.
Enjoy sewing your Magic Sash! Kids love to sew these and make a big tra-da moment when they turn them right side out.
To Your Sewing Success!
Elaine Howard
PS: Let me know how you like the Magic Sash.
To Your Sewing Success!
Elaine Howard
PS: Let me know how you like the Magic Sash.
